How to Install Bi-Fold Door?
Bi-fold doors have been essential in houses because they are lightweight, economical, and can be installed easily. While they are not intended for privacy or for security, they do an outstanding job of delivering one primary service which is masking areas that you would rather not see, such as laundry rooms, closets, pantries, and common storage spaces. Most bifold doors are connected with hardware kits that come with the door although usually are been sold independently.
A standard bi-fold kit includes:
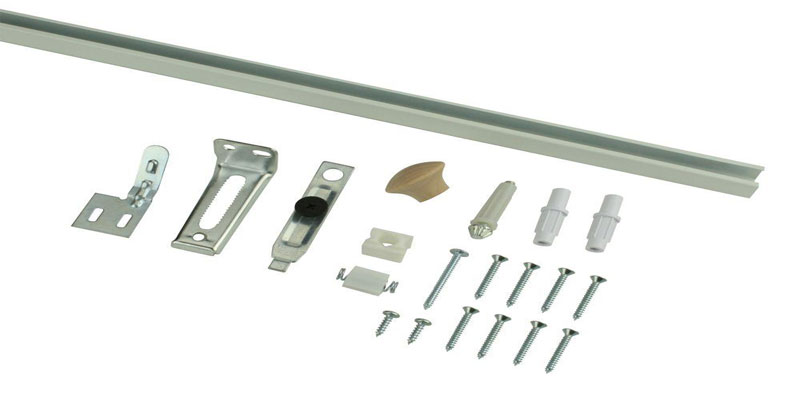
- A door track, spring stopper, and pivot guide
- Pivot support for the bottom of the door
- An adjustable pivot pin that goes into the bottom pivot support
- A fixed pivot pin for the top of the door
- A roller pin with a plastic wheel on it, for the top of the door
- Bi-fold door hardware kit
Connect the door track
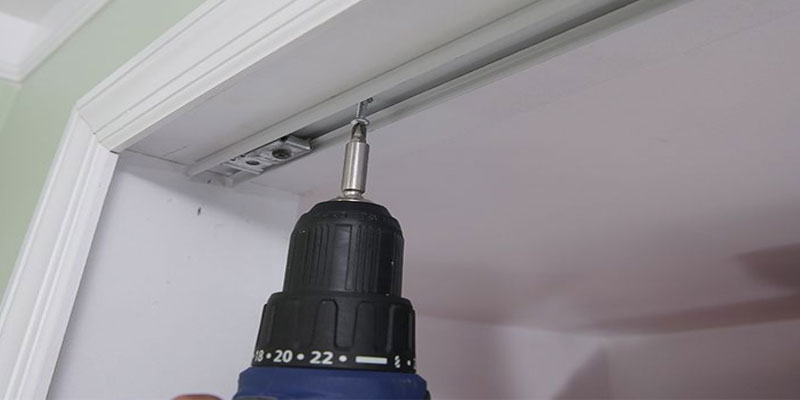
Slide the pivot guide into the track. Place the track on the top frame of the door opening, and mark the screw holes. Next, drill pilot holes at all marks, using a drill and a drill bit that is smaller than the size of the mounting screws. Reposition the track and secure it in place with the mounting screws.
Place the track so the door will be depressed somewhat inside the frame when it's closed.
Connect the top pivot pin
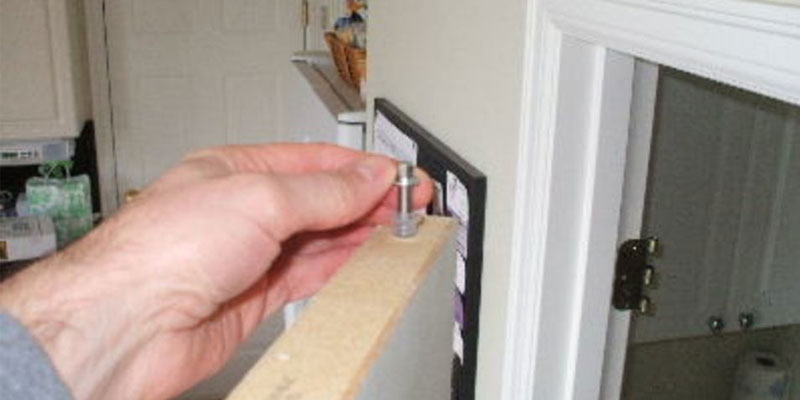
Hold up the door and place it facing the wall near the door opening, in the same position it will be installed. There are two holes on the top of the door, one per door panel. Push the top pivot pin inside the hole on the panel that will be hung on the hinge side of the doorway. Force this pin all the way inside the hole, working with a hammer to tap it lightly, if required.
Connect the roller pin
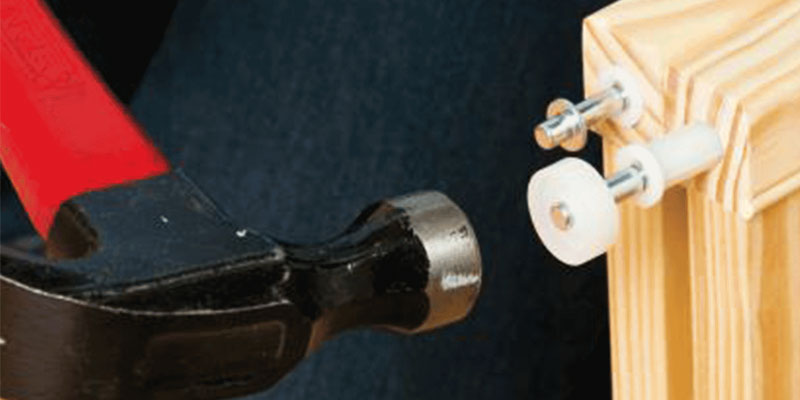
Push the roller pin inside the hole on the other door panel. Tap it lightly using a hammer, if required, but make sure not to destroy the roller or the inside spring.
Connect the bottom pin
Close the door in half and place it on the ground on its side. Push the bottom pin inside the hole on the hinged panel. The pin needs to be on the same panel as the pivot pin. Tap gently with a hammer to insert the pin all the way inside.
Connect the bottom bracket
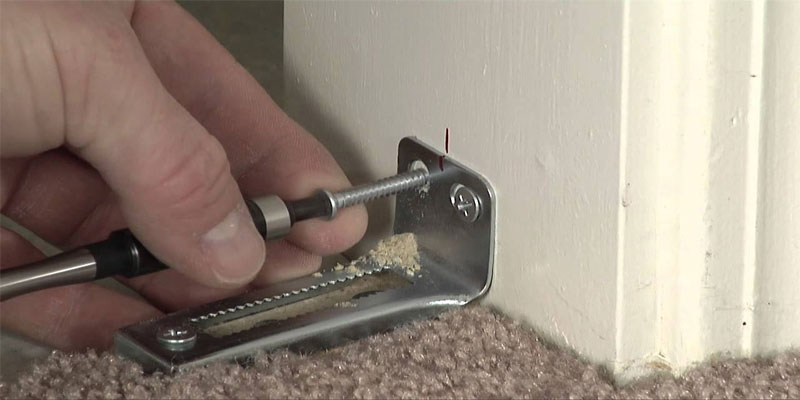
Place the L-shaped bottom base bracket onto the door frame on the hinged side of the door. Drill guide holes and attach the bracket with its mounting screws. Two screws driven into the side frame should be enough, however, there's an extra hole in the bracket in case you need to secure it into the floor for additional stability.
The center of the bottom bracket needs to be at the same distance as the center of the top pivot bracket. That guarantees the door will be correctly straightened with the frames.
Connect the door stop
Push the spring-loaded stop at the end of the track (the door opening side). You can fasten it by hand. Don't hammer it, as it can damage easily.
Attach the door

Place the top pivot pin inside the pivot guide located on the track. Move the bottom of the door in place so that the bottom pivot pin seats inside the L-shaped bottom bracket. In case the door doesn't meet accurately between the top guide and the bottom bracket, lift or drop the door, as required, by rotating the adjustable bottom pivot.
Inspect the gap within the door and the frame if it's uneven, adjust the location of the bottom pivot pin on its bracket to create the door gap uniform.
In case the door rub into the hinge-side frame, slide the top pivot pin guide and the bottom pivot pin away from the frame an identical distance. Move the top guide by releasing its screw, gliding the guide sidelong, next retightening the screw.


